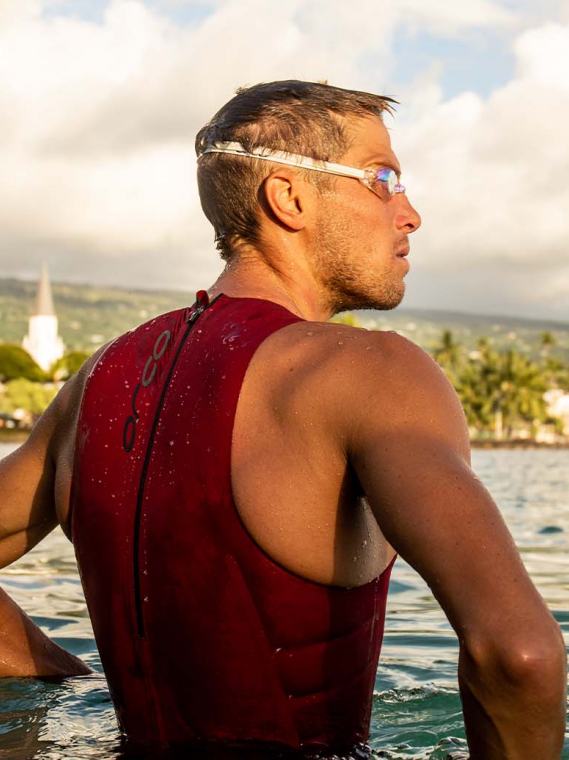
Highlight On: RS1 Swimskin for a fast non-wetsuit swim
New & Noteworthy
4. August 2015
Summer is finally here and the water is heating up - so chances are your next triathlon could be a non-wetsuit swim! Don't get caught out without a sw...
Transitions are often called Triathlon's "fourth discipline" - if you get it right it will save you valuable seconds over your competitors. Sophia Saller gives a rundown on how to set up your transition area to be in and out as quickly as possible.
Transitions are often called Triathlon’s “fourth discipline” and rightly so! If you get it right, it will save you valuable seconds over other competitors that you don’t have to swim/bike/run faster than. But how are you to know what the key things are that you should look out for when setting up your transition? German ITU athlete Sophia Saller gives a step by step on how to set up your transition area so you can be in and out as efficiently as possible.
T1 - Swim to Bike Transition
Most importantly make sure that your bike is in a gear that you can perfectly start cycling with. If you’re unsure which one that is, I usually take the one that I spin to transition in and would rather go for a gear easier if you are unsure. Note also if the bike course is going straight up a hill or down a hill right after the mount line and adjust the gear accordingly.
Once that is done, it's time to attach your cycling shoes to your bike if you feel comfortable doing so. Make sure that your right shoe is actually clipped in to your right pedal (might sound silly but a friend of mine managed to get it wrong once and then couldn’t get into her shoes!). I then usually attach the strap at the rear of triathlon cycling shoes to my bike with small elastic laces – the left shoe is attached to the skewer of your rear wheel, while the right shoe is attached to the front derailleur.
Alternatively, you might feel more comfortable putting your cycling shoes on before mounting the bike, particularly if you're a beginner. In that case just position them on the side of the bike that you want to mount the bike from, as you then don’t have to change to the other side of the bike before leaving transition. That is your bike ready for action!
In terms of nutrition, I tend to make sure that the nozzle of my bike bottle is open for “easy access” and I tape my gels to the top tube of my bike. Handy Tip: If you only tape the top of your gel to the bike, you can easily rip the gel off and open it at the same time!
I tend to hang my helmet on my handlebars with one of its straps – which side I choose usually depends on the direction I am coming from the swim and heading to, always trying to make the way I have to go the shortest possible. Other people prefer to put their helmet on their tribars, which also works perfectly. Just be cautious that in heavier winds your helmet might be blown off your tribars and end up somewhere on the ground! But whichever way you prefer, make sure your helmet is undone and easily accessible.
If you want to wear sunglasses on the bike leg either tape them to your helmet and rip them off and put them on while you are cycling or place them inside your helmet and put them on before your helmet.
A similar story for the number belt: I tend to place it over my handlebars undone and sometimes even tape it to the handlebar to keep it from being blown away (especially when transition has to be set up a long time before the start).
If you are putting your cycling shoes on in transition then you can also place your number belt closed under your cycling shoes and just pull it up when you’ve gotten into your shoes. However, if you have attached your shoes to your bike, I wouldn’t recommend doing that as you have to bend down for it – but some people prefer to do it that way even when their cycling shoes are on their bike.
And that is you ready for the first transition!
T2 - Bike to Run Transition
For the bike-to-run transition you only need to position your running shoes and potentially a gel. Make sure you know which side you tend to dismount your bike on and place your running shoes on the side of your bike you will be on to avoid having to run around your bike to get to your running shoes. In your running shoes it’s best to use elastic laces - it saves you actually having to tie up your shoelaces!
Make sure that you open your shoes as far as possible to make it as easy as possible to get into them. I also tend to put some baby powder in my running shoes to make them easier to get into and avoid getting blisters.
That’s it – you’re ready to go! So now push hard and run for that well-earned finish line!
4. August 2015
Summer is finally here and the water is heating up - so chances are your next triathlon could be a non-wetsuit swim! Don't get caught out without a sw...
24. Juli 2015
Love to get out in the openwater to swim and the feeling of freedom that comes with it but get a little anxious about being visible? Orca's new Sa...

15. Juli 2015
If you're new to triathlon, or specifically wearing a triathlon wetsuit, help is here! Seasoned Ironman athlete Andrew Starykowicz is here to show...